Straw bale gardening – using a bale of straw as a raised vegetable bed
March 24, 2013 @ 8:00 am

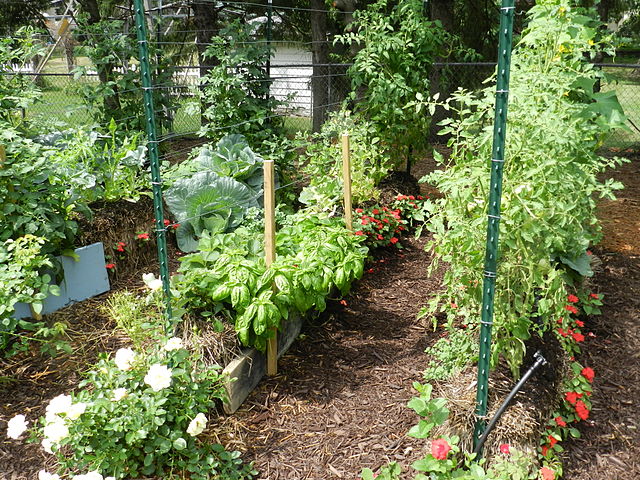
Straw bale garden. Photo by GradyJames via Creative Commons license.
Several years ago when I took an organic gardening class through Seattle Tilth, our wonderful instructors introduced us to one of the more intriguing ways to garden. It involved using a bale straw as the “raised bed” for your vegetable plot. If you lacked good soil or any soil for that matter (perhaps you only have a concrete patio out back?), you could use straw bales as would-be container. Scratch the top of the bales, add a few inches of compost or potting soil, plant your seeds, water (set up a drip irrigation hose), weed, and watch the lettuce and other veggies grow. At the end of one or possibly two growing seasons, take the bales apart and add it to your compost pile. Easy, right?
The New York Times recently published an article on straw-bale gardening, which got me thinking again about the process this week. Is it a gimmick? Could it work? The NYT interviews Joel Karsten, who wrote a new book “Straw Bale Gardens.” The article also notes that it’s not a new practice; “commercial growers experimented with straw bale, arranging it in greenhouses or laying it in outdoor trenches” from the 1950s through the 1980s. It was apparently common in Eastern Europe and the Middle East. Local urban horticulturalist Linda Chalker-Scott, with the Washington State University Extension in Puyallup, also weighed in; she liked straw-bale gardening as a low-cost technique that uses natural waste materials and mimics natural processes. “This is one of those practices that disappeared for no good reason,” she told the NYT.
Vegetables growing in straw bales. Photo by GradyJames via Creative Commons license.
How does straw bale gardening work? The straw bales (the kind you would find at your local pumpkin patch – choose weed-free straw over hay, which tends to have weed seeds) create a raised bed that’s about two or three feet high; it’s wheelchair-friendly as well as old-joints friendly! If you can find the bales (which retails for about $15 for a full weed-free bale), it could be more affordable than building a planter box or raised bed. Another advantage is that you could move the bales around from season to season. The straw slowly decomposes over time, releasing nutrients as well as residual heat to keep your plants happy against the Northwest climes.
You’ll need to condition the bales before you start planting. This will take about 1-2 weeks and allow the straw bale to decompose a bit. Here’s a good tip sheet from WVU Extension on the step by step process of getting the bales ready for planting (this will require placing the bales, keeping them damp, adding fertilizers and waiting a bit for the bales to cool down. Here’s another fact sheet on straw bale gardens. Seattle Tilth usually has a straw bale garden at its garden at the Good Shepherd Center in Wallingford in case you want to see one in action.
Filed under Seattle Landscape Maintenance, Vegetable Gardening Permalink · No Comments »
 Fortunately, the city of Seattle has been encouraging residents to plant urban gardens for a number of years as the urban farm movement has taken hold. The mayor and others even


 Here are some ways to get a better redder crop of tomatoes:


 Get your kids good-quality tools that fit small hands, rather than having them wrestle with adult-sized tools. Practice safe handling of those tools, and teach them how to put tools away. My son has a blue metal shovel, a yellow hoe, and a bamboo shrub rake. Each cost between $5 and $10. We bought all three at the West Seattle
  Read books about gardens and bugs. The


")